

How To Secure Radon Vent Pipes in High-Wind Areas
A radon mitigation system operates quietly in the background, but the vent pipe outside your home endures whatever the weather throws at it. Strong winds can push, pull, and vibrate a tall exterior pipe for hours at a time. Over time, that movement can strain brackets, loosen connections, and create noise along the side of the house.
Homeowners in windy areas should pay close attention to how the radon vent pipe attaches to the structure. A secure installation helps keep the pipe aligned while the system continues to move radon safely outdoors. Smart choices about support, placement, and maintenance can make a big difference when gusty weather arrives.
Plan Strong Supports
A radon vent pipe needs more than one secure attachment point. Wind creates side-to-side forces, especially on long vertical runs that extend above the roofline. The farther the pipe is from a firm support, the more leverage wind can exert on the pipe and its fittings.
Use hangers, straps, or brackets that fit the pipe and anchor securely to a suitable part of the building. The support system should limit lateral movement and vertical shifting. It should also prevent the pipe from rubbing against siding, trim, roofing, or other surfaces during strong gusts.
Industry standards require installers to secure radon piping to the building using durable supports and weather-rated outdoor hardware.
Anchor to the Structure
A bracket can only perform as well as the surface behind it. Fasteners need a strong attachment point that can support the pipe load and withstand repeated wind pressure. Siding alone may not provide sufficient holding strength, so the installer should identify framing or another suitable structural surface before installing supports.
Avoid attaching radon piping to gutters, plumbing lines, ducts, or mechanical equipment. These components may move, flex, or require future service. A dedicated support system provides a stable connection for the radon pipe without stressing unrelated parts of the home.
The right fastener also depends on the surface. Wood, masonry, and other exterior materials require different anchors.

Match Hardware to Pipe
Loose or poorly fitted hardware can cause a vent pipe to shake even when every bracket remains attached to the wall. Choose supports that match the pipe diameter and hold it firmly without crushing or distorting the PVC.
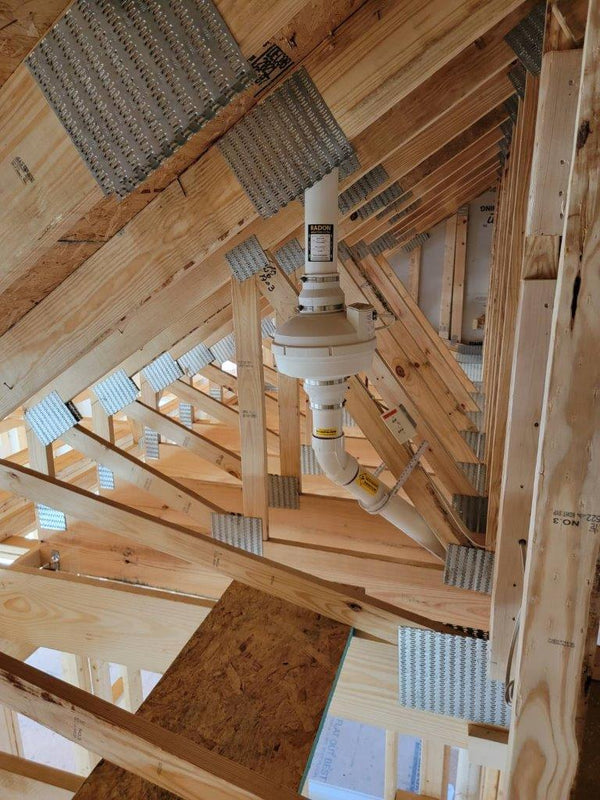
Installers may use radon fan mounting accessories alongside pipe supports to stabilize the fan area, reduce vibration, or create a cleaner mounting setup. The fan adds weight and vibration to the system, so nearby components need solid support as well. A stable fan assembly can also reduce movement transmitted to nearby vent piping.
Look at the entire exterior run instead of focusing on one bracket or fitting. A strong installation supports several important points and keeps the fan, pipe, and discharge section working together as a stable system.
Support the Fan
The fan often sits along an exterior vertical run, making its mounting area especially important in windy conditions. Wind can move the pipe while the fan produces steady vibration. Without solid support, those forces can place extra stress on couplings and nearby joints.
Place structural support close enough to the fan to control movement in the pipe above and below it. Flexible couplings can help with fan installation and future service, but they should not support a long, unsupported pipe run. Brackets and other supports should carry that load.
A protective fan cover can help shield exterior equipment from rain, snow, and debris. The cover should not serve as the primary pipe support. The pipe and fan still require their own secure mounting points.
Stabilize the Discharge
The top of the vent stack can face strong wind pressure because it often extends into open air above the roof edge. That exposed section needs enough support to prevent excessive swaying. A tall, unsupported extension can transfer movement down the pipe and stress lower fittings.
Keep the discharge configuration consistent with radon requirements and local codes. The vent must still release radon outdoors at the proper location, so wind protection should never block the opening or redirect exhaust toward the home. If the pipe extends high enough to require additional lateral support, a radon professional can select an appropriate method for the building and local conditions.
Reduce Wind Exposure
Pipe routing can affect how much wind pressure the system receives. A long run across an open wall may catch more wind than a route that stays closer to the building and uses shorter unsupported sections. Installers should balance wind exposure with airflow needs, discharge requirements, service access, and the home’s layout.
Extra elbows and complex routing can increase resistance within the system, so changing the pipe path requires care. The installer should design a practical route that supports steady airflow while keeping the exterior assembly stable.
Homes with unusual rooflines, tall walls, or exposed corners may need a customized approach. A certified radon professional can evaluate those conditions and recommend a mounting plan that fits the property.

Check After Storms
Even a well-supported vent pipe can benefit from a visual inspection after strong winds, heavy snow, or a major storm. Walk around the exterior and look for leaning, loose brackets, shifted couplings, cracked fittings, or new gaps between the pipe and its supports. Listen for any rattling or tapping that did not occur before the storm.
Do not climb onto the roof or attempt risky repairs to inspect the discharge point. From the ground, you can often spot major misalignments. If anything looks loose or damaged, contact a qualified radon professional.
Replace Worn Hardware
Outdoor mounting hardware faces sun, moisture, temperature swings, and repeated vibration. Those conditions can weaken components over time. Routine visual checks give homeowners a chance to catch corrosion, cracking, loosening, or other wear before a storm turns a small problem into a larger repair.
Tightening a loose support may seem simple, but homeowners should avoid any changes that could crack the pipe, damage siding, or alter the system layout. A radon professional can replace worn hardware and confirm that the vent path still complies with current requirements.
Exterior renovations, roof work, or siding replacement can also affect an older mounting setup. Ask a radon professional to review the vent supports after major work near the system.
Keep the System Steady
High winds can challenge any exterior radon vent pipe, but a thoughtful mounting setup can keep a radon system stable through rough weather. Strong structural anchors, well-fitted supports, weather-rated hardware, and careful attention around the fan and discharge point all help control movement.
Homeowners do not need to wait for a rattling pipe or visible lean before taking action. Check the exterior system periodically, especially after severe weather, and address loose or worn components promptly. With secure mounting and regular care, your radon vent pipe can stay steady while the mitigation system continues doing its job.