


10 Tips for Replacing Your Radon Fan Yourself
While installing a radon mitigation fan takes some time and effort, the benefits to your home and health are well worth it. Long-term radon exposure is a leading cause of lung cancer, and there’s no way to know if you have radon in your home without testing for it.
If you have tested your home for radon and found levels in excess of 4 pCi/L (picocuries per liter), you need a functioning radon mitigation system in place. If you already have a radon fan, it may be time to replace it.
We always recommend hiring a professional to install your radon mitigation system. You can find recommended radon professionals for your area, by state, on our website.
However, if you are committed to replacing your radon fan yourself, there are a few things you should know before you start.
First, if the replacement fan you select is not identical to the original, make certain it performs just as well or better than your current radon fan. Also, check the warranty on your radon system before doing anything yourself since replacing the fan on your own could void any warranty the system carries.
Second, if you are considering installing your own radon system from scratch, a home inspector will likely evaluate that system if and when you decide to sell your home. There are many aspects to radon mitigation standards that are often difficult for homeowners to understand and meet on their own. Additionally, the vast majority of buyers will want to know who installed the radon system, what the warranty is, and whom to call when it needs service. Performing an installation yourself could jeopardize your home sale for these reasons.
That being said, if you are dedicated to replacing your own radon fan, use these tips from Festa Radon to help you do the job accurately.
Get an Initial Reading
Before you install a new radon mitigation fan, get an accurate reading of the radon levels in your home. A long-term radon detector is a good investment for any homeowner, as it’ll last for years and provide more accurate readings than its single-use counterparts.
Test radon levels in your home before, during, and after installation of your replacement fan to ensure the levels are decreasing.
Perform Preliminary Sealing
Where is your current radon fan installed? Most radon mitigation systems start in the basement because radon often makes its way into a home through the foundation. The fan can be installed in an attic or basement, over a garage, or on the exterior of your home. Check the installation areas for cracks, gaps, and holes in concrete.
Use urethane caulk to seal small gaps and cracks in the concrete floor and walls near your radon mitigation system. If you’re dealing with larger cracks or holes, use hydraulic cement or expanding foam to plug them up.
Assess Your Foundation
Are you planning to drill new holes for the PVC piping you’re going to attach to your radon fan? Radon mitigation systems are often installed near basement walls. Drill a test hole in your basement floor a few inches from the wall and feel around to make sure you haven’t hit the footing. If you do, drill another test hole a few inches further from the wall.
Concrete floors are usually about four inches thick, so you’ll need a masonry drill bit that’s slightly longer. Make sure the hole you drill doesn’t hit the foundation’s footing so you have room to install your PVC pipe.
Plan Pipe Locations
Where are you planning to run the PVC pipe for your radon mitigation fan system? Be strategic about your plans before drilling holes in your living space. Installing PVC pipe in living areas looks unprofessional; that’s why many homeowners opt to run their pipes from the basement to an attached garage.
Limit your piping’s exposure to the elements by running as much of it indoors as possible. Try running the line from the basement through the inside of the garage to the attic or your home’s exterior. Make sure the end of that pipe is at least 10 feet away from any windows, as it will expel radon gas.
Drill a Hole
If you need to drill a new hole for your replacement radon fan system, you have a couple of options at your disposal. The first involves using a rotary drill and coring bit to create a hole in the concrete that’s slightly larger than your PVC piping.
The other option needs only a masonry bit on your regular drill. Use a pencil to sketch an adequately sized circle on the concrete floor. Then, following your outline, drill several small holes close together. When you’re done, use a hammer to punch out the center.
Create a Suction Pit
Once you have a hole for your PVC pipe, take a wet/dry vac and suction out some of the base material under your slab. This shallow pit under the hole will give the radon seeping through your foundation a space to gather before being pulled into the piping and moved toward the fan.
If the base material under your foundation is a loose gravel compound, remove about 5 gallons of it with your wet/dry vac. Meanwhile, if it’s a tightly packed material like clay, sand, or dirt, prepare to dig out approximately 15 gallons.
Do a Dry Fit
Before you glue any pipes or fittings in place, perform a dry fit test to ensure everything will fit. Enlarge any holes if necessary, and plan exactly where you’re going to place your pipes and fittings before you use any adhesives.
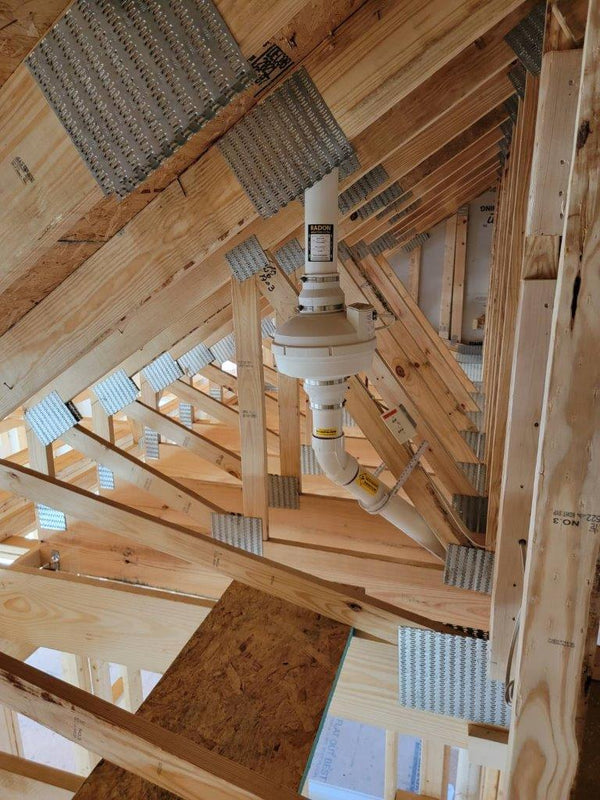
Lay PVC Pipe
When you’re ready to put your PVC in place, attach the piping to the fan and work from the top down. As you work your way down, secure the piping in place with brackets and sealant; use a wide-diameter drill to make holes as necessary. The last bit of piping will go into the hole you drilled in your foundation. Once you turn on your new radon fan, the radon that gathers in your suction pit will travel through the piping toward the fan.
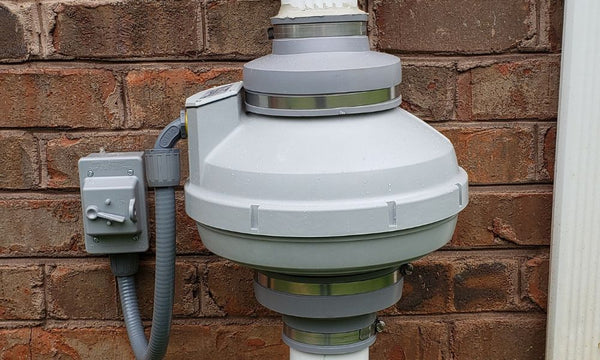
Protective Tip:
Minimize your radon mitigation system’s exposure to weather changes as much as possible. If you’re running piping through a part of your home that’s noticeably hotter or colder, use extra insulation on the PVC to protect it. As for the radon fan itself, an exterior radon fan cover kit will keep the fan’s components safe from exposure to the elements and extend its overall lifespan.
Seal the System
Now that all of your piping is in place and attached to your new radon fan, it’s time to make the whole system airtight. You don’t want radon leaking through any weak spots in your piping!
For the top end, use caulk around the piping to seal it in place. On the foundation side, use hydraulic cement to close any gaps between the piping and the concrete slab.
Test the System’s Functionality
Once your new radon mitigation system is fully in place, make sure it’s running as intended. Turn on your radon fan, then go to your basement and drill a small test hole somewhere in your foundation. Light a piece of paper on fire and hold it near the hole to see if that smoke gets pulled in. If you do see air being drawn into the hole in your foundation, that means your radon fan is working as intended.
As a final step, install a manometer on the piping in your basement. This instrument measures pressure and can tell you if there’s enough of it in your basement to pull radon out of the foundation.
Need to replace your radon fan? With the right tools and knowledge, you can do it yourself in the span of a weekend. Use Festa Radon’s tips if you are committed to replacing your own radon mitigation system.
