


Retrofitting a Radon Mitigation System: A Guide
Many homeowners don’t consider radon until a test reveals a problem. By then, the house is already standing, the basement has accumulated years of wear, and the foundation may have cracks, gaps, and utility openings that allow soil gases to enter. That’s why retrofitting a radon mitigation system is important. It provides homeowners with a practical way to reduce radon levels without dismantling the home or starting over.
A retrofit adds a mitigation system to an existing structure instead of installing one during new construction. This difference influences every part of the process. The installer must work with the home as it currently is, which means the plan has to match the layout, foundation type, and how air moves through the lowest level. When the system fits the home well, it can effectively reduce radon while maintaining the space’s appearance and functionality.
Homeowners often worry that retrofitting will feel invasive or overly complex. In most cases, a qualified installer can design a sleek system that blends into the home and functions with minimal disruption. The key is understanding what the system needs to do and how each part helps ensure safer indoor air. Continue reading to explore a guide for retrofitting a radon mitigation system.
How a Retrofit System Works
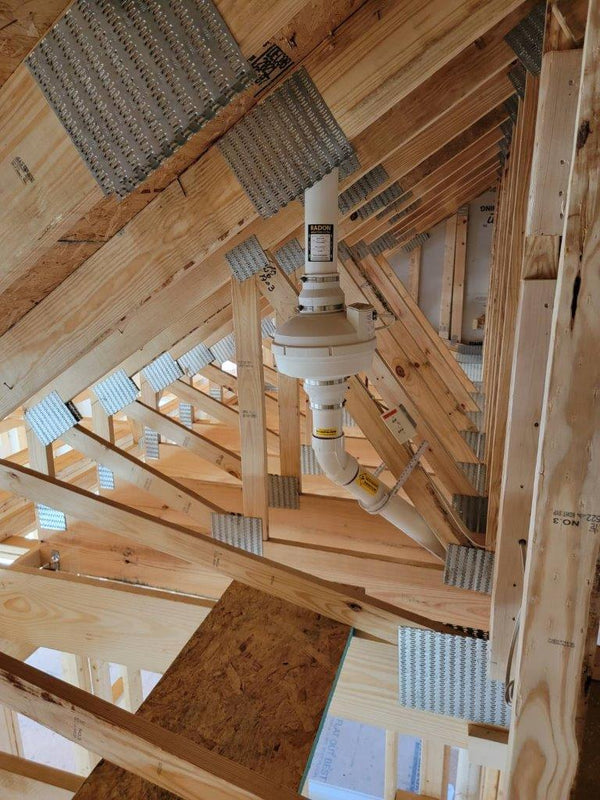
A retrofit radon mitigation system typically functions by creating negative pressure underneath the home. This pressure change pulls radon gas from beneath the slab or foundation and moves it through a vent pipe to the outside. Instead of drifting into the living space, the gas exits above the roofline, where it can disperse into outdoor air.
Most retrofit systems use active soil depressurization, relying on a fan to circulate air through the pipe. The fan doesn’t remove radon from the indoor air; instead, it prevents radon from entering by redirecting soil gases before they can rise into the structure.
The exact design varies depending on the home. A house with a basement might require suction beneath the slab. A crawl space could need a sealed membrane and a depressurization system below it. A home with multiple additions or unusual foundation sections might need a more customized approach. The installer’s role is to analyze the structure and determine the most effective system layout.

What Happens Before Installation
A successful retrofit begins with a thorough evaluation. The installer typically reviews the radon test results, inspects the foundation, identifies potential entry points, and determines the optimal route for the vent pipe. This inspection helps decide where the suction point should be placed and where the fan can operate efficiently without causing unnecessary noise or visual disturbances.
Foundation styles are very important. A poured concrete slab acts differently from a block wall foundation. Some homes have easy access underneath the slab, while others have footings, thick fill, or separate sections that affect how air flows. An experienced installer observes these details and designs accordingly.
Homeowners should also anticipate a discussion about aesthetics and accessibility. In many homes, the vent pipe can run through a garage, utility area, or outside wall. The location of the fan is important because it must remain outside the conditioned living space. Installers often place it in an attic, garage attic, or on the outside of the home, depending on the layout and local code requirements.
Key Parts of the Retrofit System
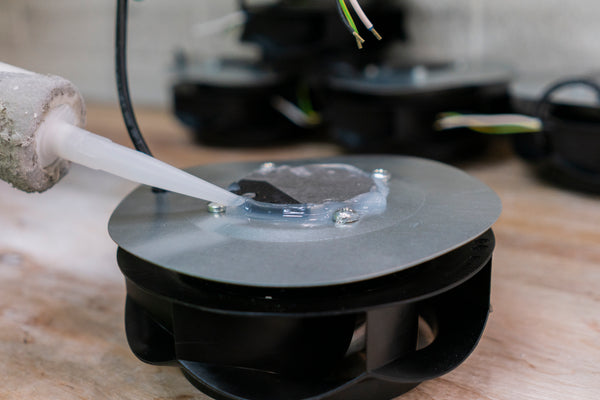
Every retrofit system consists of several key parts. The suction point draws soil gases from beneath the house. The vent pipe guides these gases upward. The fan generates the pressure difference that keeps the system functioning. The discharge point releases the gases safely above the house. A monitoring device allows the homeowner to verify that the system is still working.
Sealing also supports the system, but sealing alone won’t solve a radon problem. Installers often seal visible cracks, control joints, sump lids, and utility penetrations to improve system performance and reduce conditioned air loss. These steps help the fan focus on drawing gases from beneath the slab instead of from open gaps in the basement floor.
Hardware choices are more important than many realize. For instance, installers could use pipe mounting hardware to secure the fan and reduce vibration. A stable setup can help the system operate more quietly and keep components aligned over time. Small details like that add to the overall quality of the retrofit.

Challenges That Come With Older Homes
Older homes often pose the biggest retrofit challenges. Over time, foundations settle, repairs alter original layouts, and additional utilities create more openings through floors and walls. Some basements have finished spaces that limit access to ideal pipe routes. Others feature multiple foundation types within one structure, which can complicate depressurization.
Crawl spaces also need extra attention. If the space has exposed earth, the system might require a durable membrane across the soil, sealed edges, and a suction point beneath the barrier. While this setup can be effective, it demands careful installation. Gaps, tears, or weak seals can lessen its effectiveness.
Some older homes predate the practice of placing a layer of construction gravel beneath the slab. As a result, contractors built on compacted substrates (such as compacted soil or clay) that require higher-suction fan models.
Some homeowners believe a challenging house can’t support a good retrofit. That’s usually not true. Complex homes might need more planning and a more customized system design, but many can still support effective mitigation. The right installer won’t try to fit a generic setup into a complicated structure. They’ll adapt the system to the specific conditions.
What Homeowners Can Expect During the Process
Most retrofits progress more quickly than homeowners expect. After the assessment, the installer develops a plan, chooses locations for the suction point and vent pipe, and completes the installation. The work may include drilling through the slab, sealing gaps, routing pipe through the house or along an exterior wall, and mounting the fan in the selected location.
Homeowners should anticipate some noise during installation and a small amount of dust in work areas, although a careful crew takes steps to manage it. They should also expect the finished system to remain visible in some way. Even a clean retrofit includes pipe runs and a fan, but strong design choices can keep the system neat and unobtrusive.
After installation, the home needs follow-up radon testing. This test confirms whether the retrofit reduced radon to a safe level. It also provides the homeowner with peace of mind by showing how the system performs under real conditions rather than just on paper.
Long-Term Performance and Maintenance
A retrofit system requires regular attention but doesn’t need constant work. The homeowner should periodically check the system monitor and watch for any changes in fan noise or vibration. If the monitor indicates a problem or the fan stops working, the system needs servicing.
Retesting the home remains important even after installation. Conditions can shift over time due to weather patterns, structural changes, renovations, or aging equipment. Periodic testing helps confirm that the system still does its job. It also helps homeowners catch issues before radon levels climb again.
Maintenance may include fan replacement after years of use, resealing certain points, or checking exposed piping and connections. A well-installed retrofit often performs reliably for a long time, especially when homeowners pay attention to signs of wear and respond early.
Choosing the Right Retrofit Approach
Not every home needs the same solution, and that’s one of the most important things a homeowner can understand. A successful retrofit doesn’t come from installing standard parts in standard locations. It comes from tailoring the system to the foundation, airflow patterns, and structural realities of the house.
That’s why professional evaluation is important. A skilled installer looks beyond just the radon level and studies how the home functions. They select pipe routes that are effective, fan locations that make sense, and support components that enhance durability. They also explain the plan clearly so the homeowner understands what will happen and why it matters.
Retrofitting a radon mitigation system gives homeowners a practical path to lower radon in an existing house. It doesn’t require a new build, and it doesn’t depend on luck. With a thoughtful design and a quality installation, a retrofit can improve indoor air and help homeowners feel more confident in the space where they live every day.